When a sub-project is added against a project, the users from the parent project can be automatically added to it. The pop-up that appears on screen will look as follows:
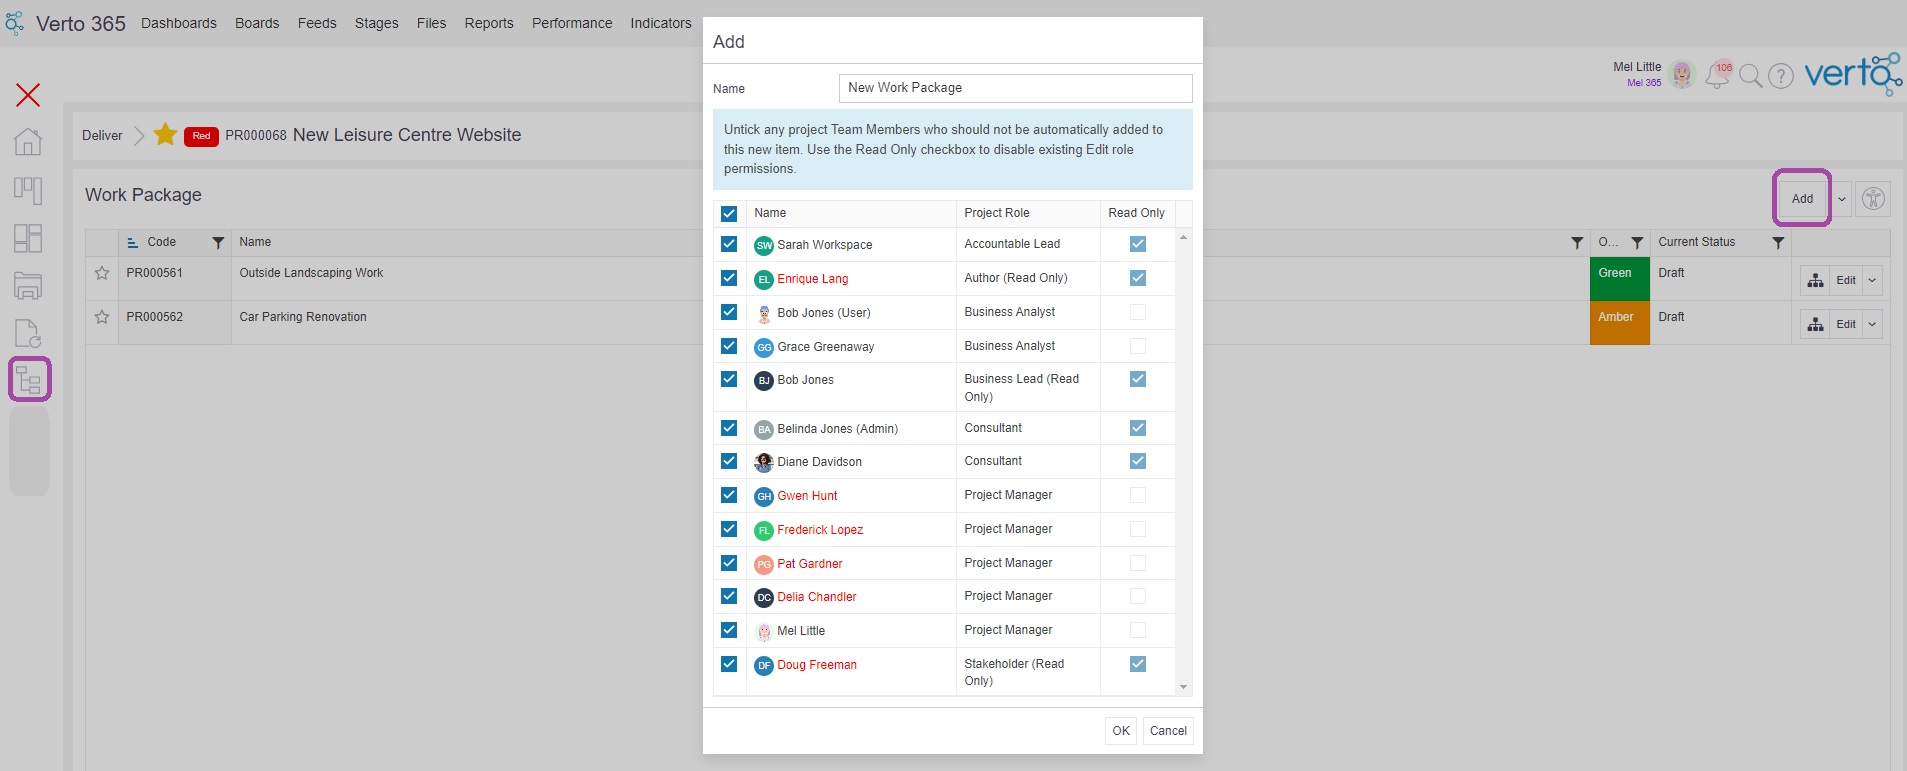
By default, every user on the parent project (as listed within the Project Members control) will be displayed and selected. The project role shown against the user will be their role within the parent project.
If a user should not be added to the new sub-project, simply remove the tick from the blue checkbox on the left-hand side.
Sub-Project Role Permissions
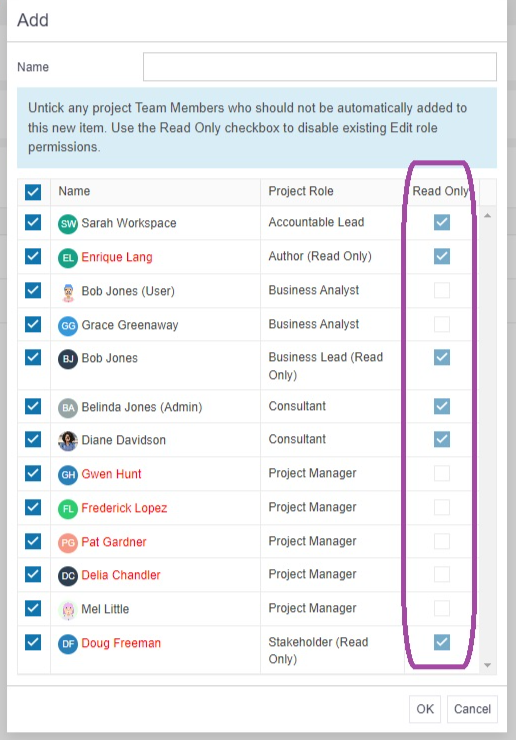
If the project role that the user has in the pop-up i.e. Business Analyst, is ‘Read Only’ for the sub-project stage, then the Read Only check box on the right-hand side of the pop-up will be 'greyed' out and disabled. Adding this user to the sub-project in this role can only ever give them Read Only permissions.
If the user in the parent project is assigned a Read Only project role but that role in the sub-project stage is an Edit role, then the Read Only check box will be ticked by default but can be unticked to give the user edit permissions for the new sub-project.
Finally, if the user is assigned an Edit role in the parent project and this is also an Edit role in the sub-project stage, then the ‘Read Only’ check box will be unticked by default but can be ticked to give the user read only permissions for the new sub-project.
When you have set the desired permissions for each user, simply click ‘OK’ to create the new sub-project.
Top Tips
- A users ability to edit the contents of a sub-project will be determined by the project role permissions assigned to the sub-project stage.
- The project role permissions and sub-project role permissions are set by your Systems Administrator.