Filters are a useful tool to control and customise the data being displayed in the widgets on your dashboard. Here are a couple of examples:
Example 1 - add a single filter
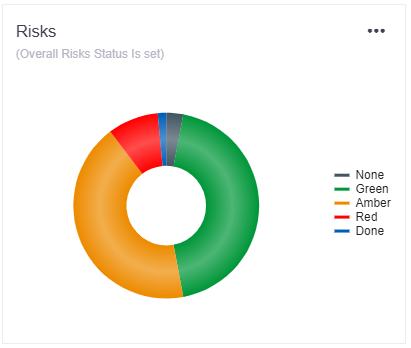
- Create a widget to display information about risks within a project.
- Add a filter to then narrow this down to display risks based on their status.
Example 2 - add multiple filters
- Create a widget to display information about risks within a project.
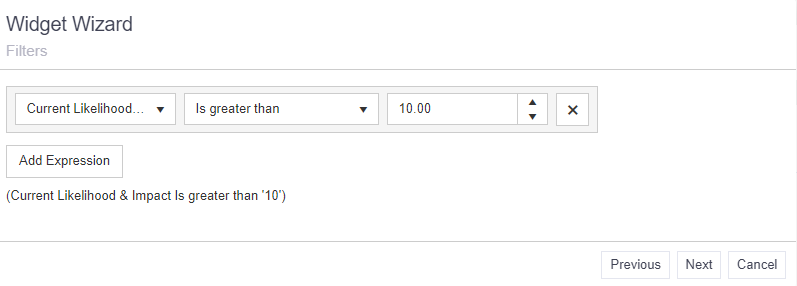
- Add multiple filters to narrow this down even further, such as, only display risks that are key AND are in a specific risk category.

You can either add filters to individual widgets in your dashboard, or you can add filters to a container widget. Any widgets held within the container will then respect the filters applied at container level.
Add filters to a new widget
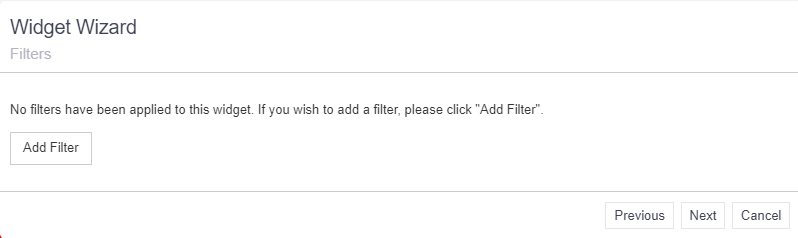
Choose a widget and select the data level (top or specific area/theme) that the widget will be linked to. To apply filters at this stage, click on the Add Filter button to be taken to the Filter menu.
Select the filters you wish to apply to your widget and then click Next.
Add filters to an existing widget
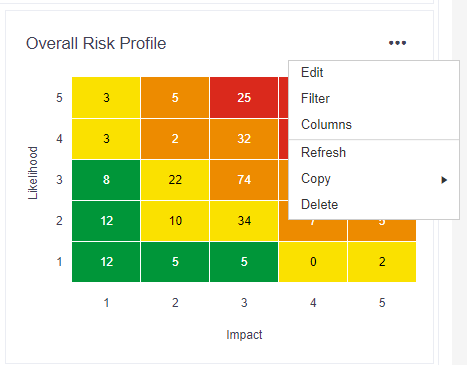
To add a filter to an existing widget, click on the 3 dots in the top right hand corner of the widget and select Filter from the menu. Choose the filters you wish to apply to your widget and then click OK.
Watch this video to find out more: